Documentation

Propfusion CRM documentation and guides

Step-by-step guides for Propfusion CRM: set up your company, import leads and listings, connect the portals and WhatsApp, and train your team. Inside the CRM, every main screen also has its own guided tour.

  • 7-step set-up guide
  • 6 everyday guides
  • 80+ guided tours in the CRM
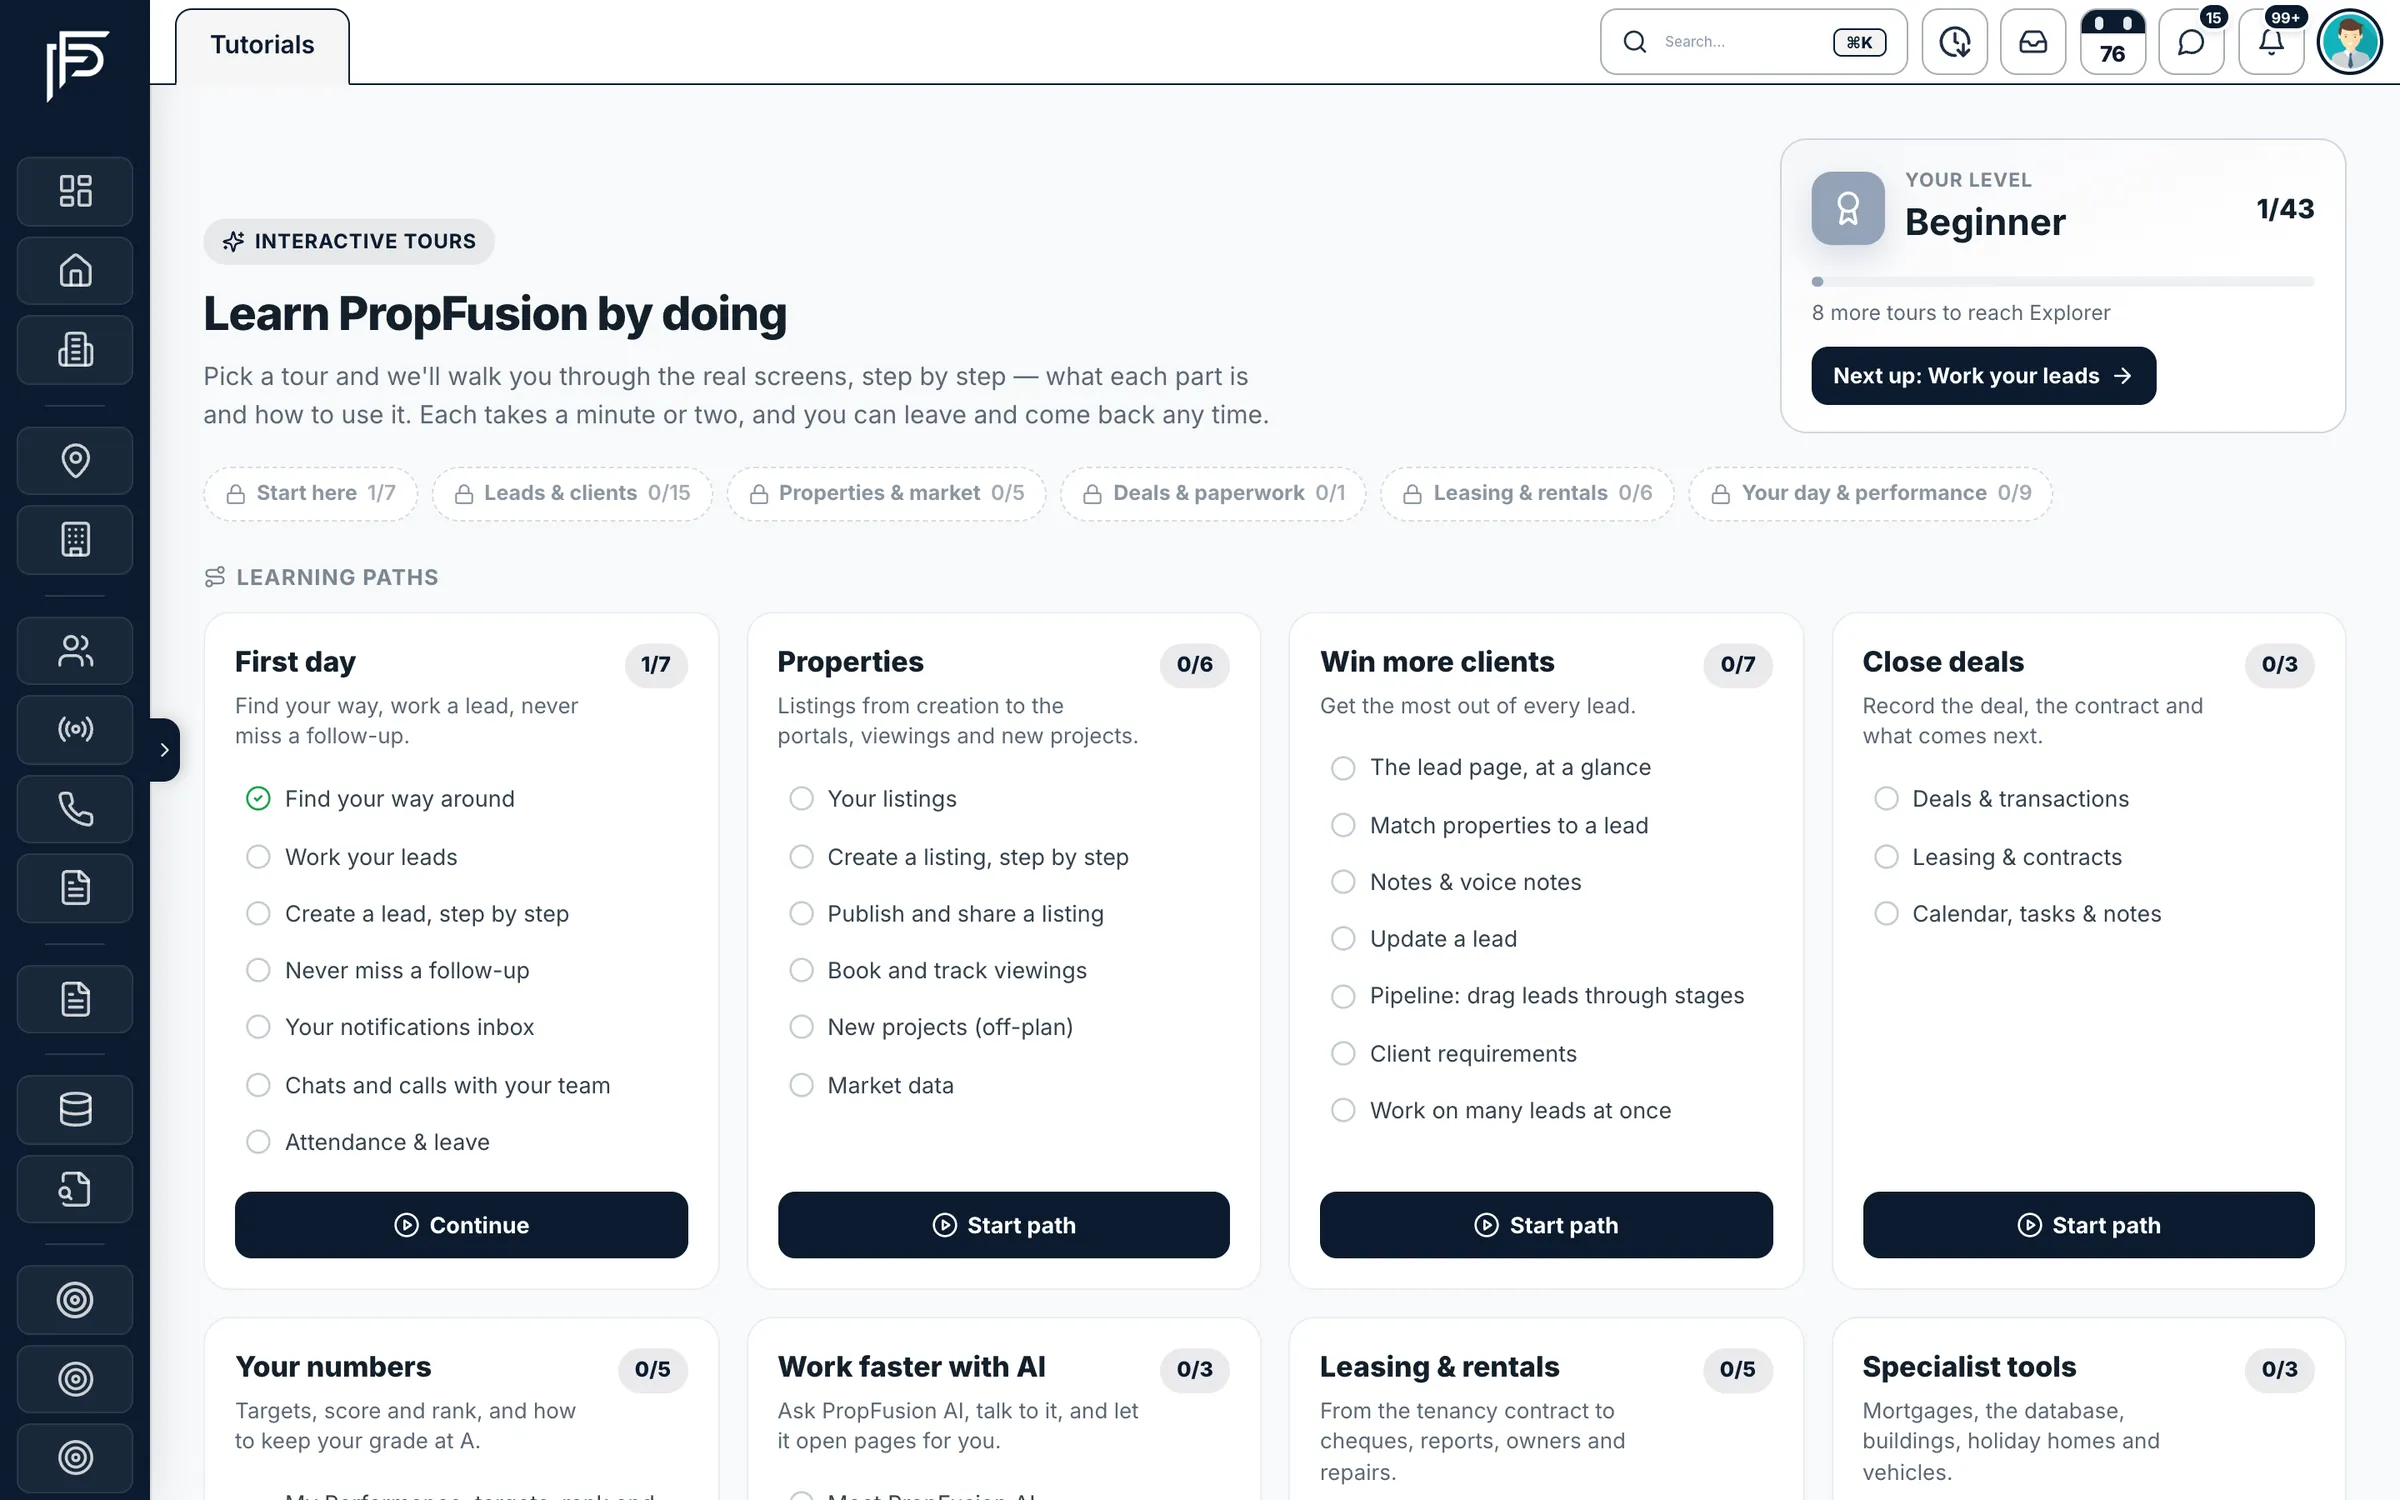
Propfusion CRM: Tutorials page with interactive tours grouped into learning paths and a level progress card

For admins

Set up Propfusion for your company

Seven steps, in the order that saves rework: the company and roles first, then people and data, then the portals and how leads are routed.

Each step has a guided tour in the CRM under Tutorials, on the For managers & admins tab.

  1. Step 1

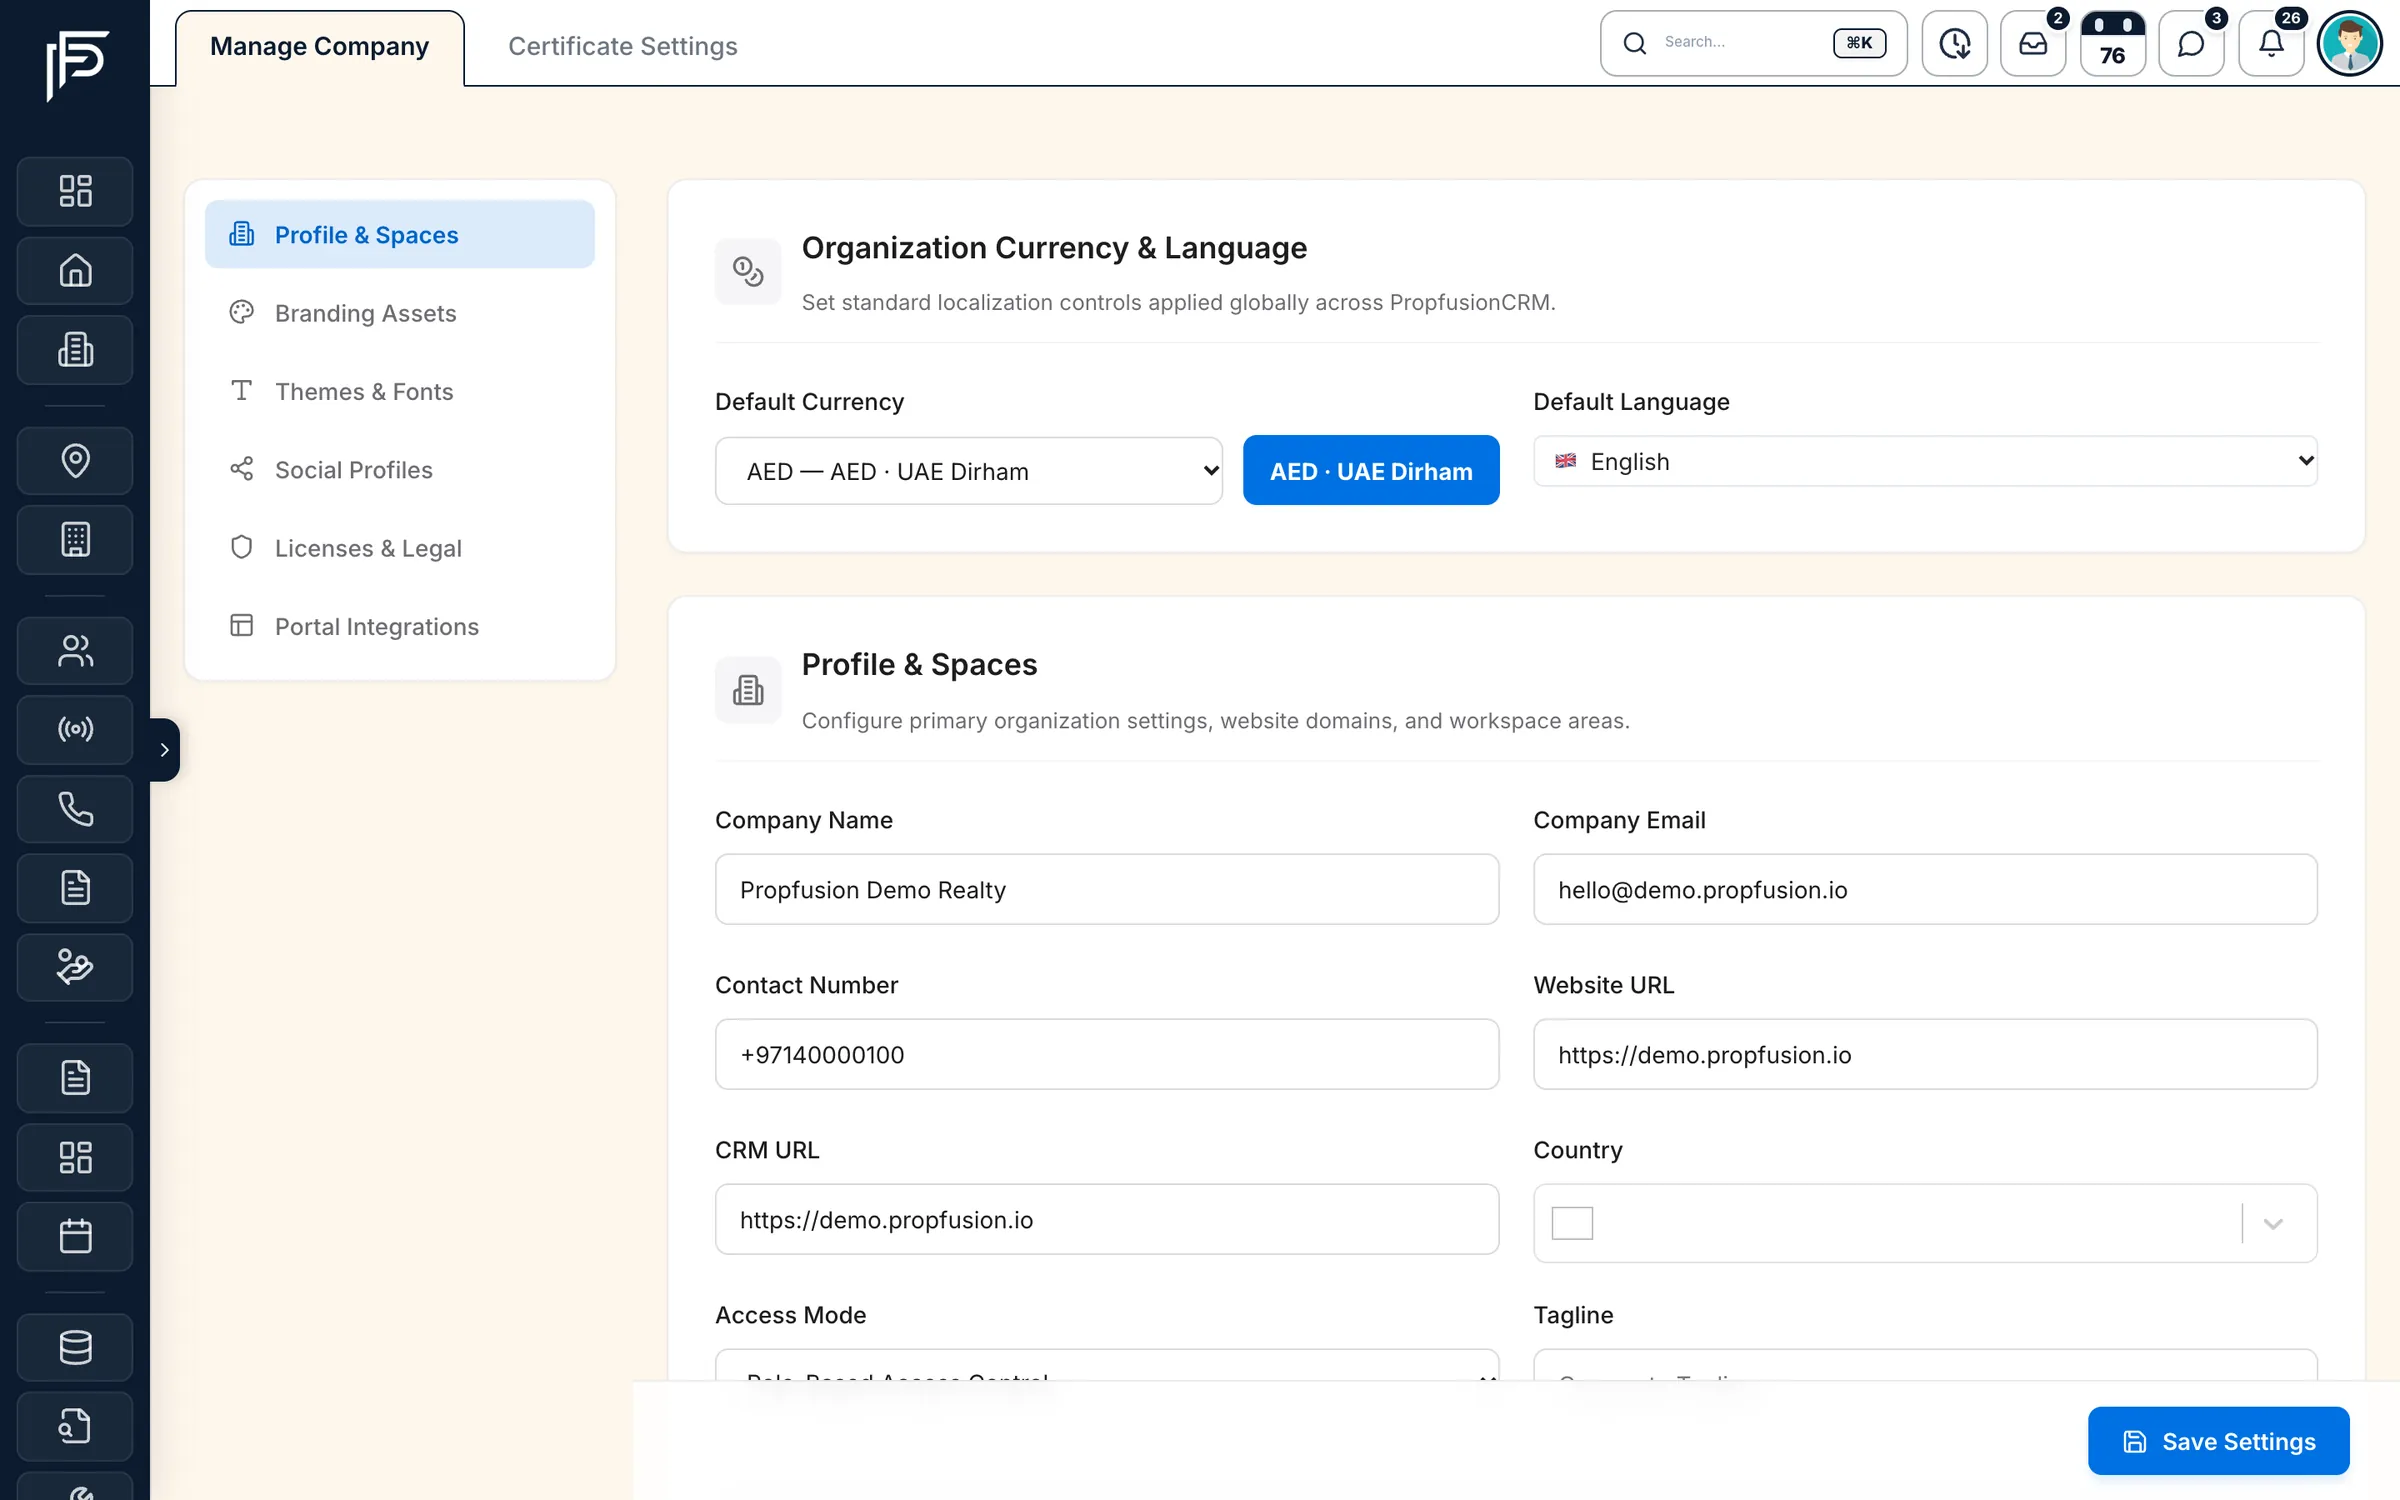
    Add your company details and branding

    In Settings, Manage Company Details holds your name, logo, contact details, licence number and the colour that themes the CRM. The licence number is needed to validate Trakheesi permits, and your logo can watermark listing photos as agents upload them.

    Tour in the CRM: Company profile & branding

  2. Step 2

    Set up roles and permissions

    Decide what each role can see and do before you invite anyone: roles control every menu your agents see. Organization Features switches whole modules, such as Contracts, Rental Agreements or Hospitality, on or off for the company.

    Tour in the CRM: Roles & permissions

  3. Step 3

    Add your team

    Add each person with their name, email, phone, role and team, and set who reports to whom in Teams & hierarchy. If someone can't log in, check that their account is Active on the Staff page.

    Tour in the CRM: Add and manage your staff

  4. Step 4

    Import your data

    Data Import takes leads, listings, owners and tenants from spreadsheets or another CRM: pick what you're importing, download its template, fill it in and upload it. The leasing master workbook is checked in a preview before anything is saved, and developers and their projects come in from a catalog sync. Import developers first, then listings, then leads, and owners and tenants before the leasing sheet, so everything links up.

    Tour in the CRM: Import your data

  5. Step 5

    Connect the portals, Meta and WhatsApp

    Connect Property Finder, Bayut and Dubizzle with their keys so listings publish from the CRM and portal leads arrive with their source. Add Meta lead ads, WhatsApp message templates for your agents, and API keys for your website's enquiry forms.

    Tour in the CRM: Portals & integrations

  6. Step 6

    Decide how leads are handled

    Set your lead stages and statuses, choose who gets new leads with distribution plans, and add a rescue plan that moves leads nobody touched. The response target, how fast agents must act on a new lead, sets what counts as on time in every agent's health grade.

    Tour in the CRM: Lead distribution & routing

  7. Step 7

    Train your team

    Everyone gets the guided tours for their role automatically. Give new joiners the first-week plan: the First day path, then properties, then Close deals and Your numbers, then Work faster with AI.

    Tour in the CRM: Train your team

Where each step happens

The Settings screens behind the company, roles, team, integrations and lead-routing steps.

Propfusion CRM: Company settings with currency and language, company name, email, phone and website, plus branding and legal tabs
Manage Company: your profile, branding, themes, licences and which portals are switched on, with AED as the default currency.

For agents

Everyday guides

The tasks agents do every day, step by step, exactly as they work in the CRM.

Create a listing

Four short steps: Information, Description, Media and Portals.

  1. 1With Property Finder connected and your licence number saved, enter the Trakheesi permit number, pick the permit type and press Fetch details to fill in the type, size, price, location and developer.
  2. 2Check the details, link the owner and set the price (for rentals, the rent period too). Press Continue.
  3. 3Write the title and description, then upload photos (the first is the cover; drag to reorder), floor plans and a video.
  4. 4Choose the portals, add the permit under Compliance & reference, and press Publish listing or Save draft.

Tour in the CRM: Create a listing, step by step
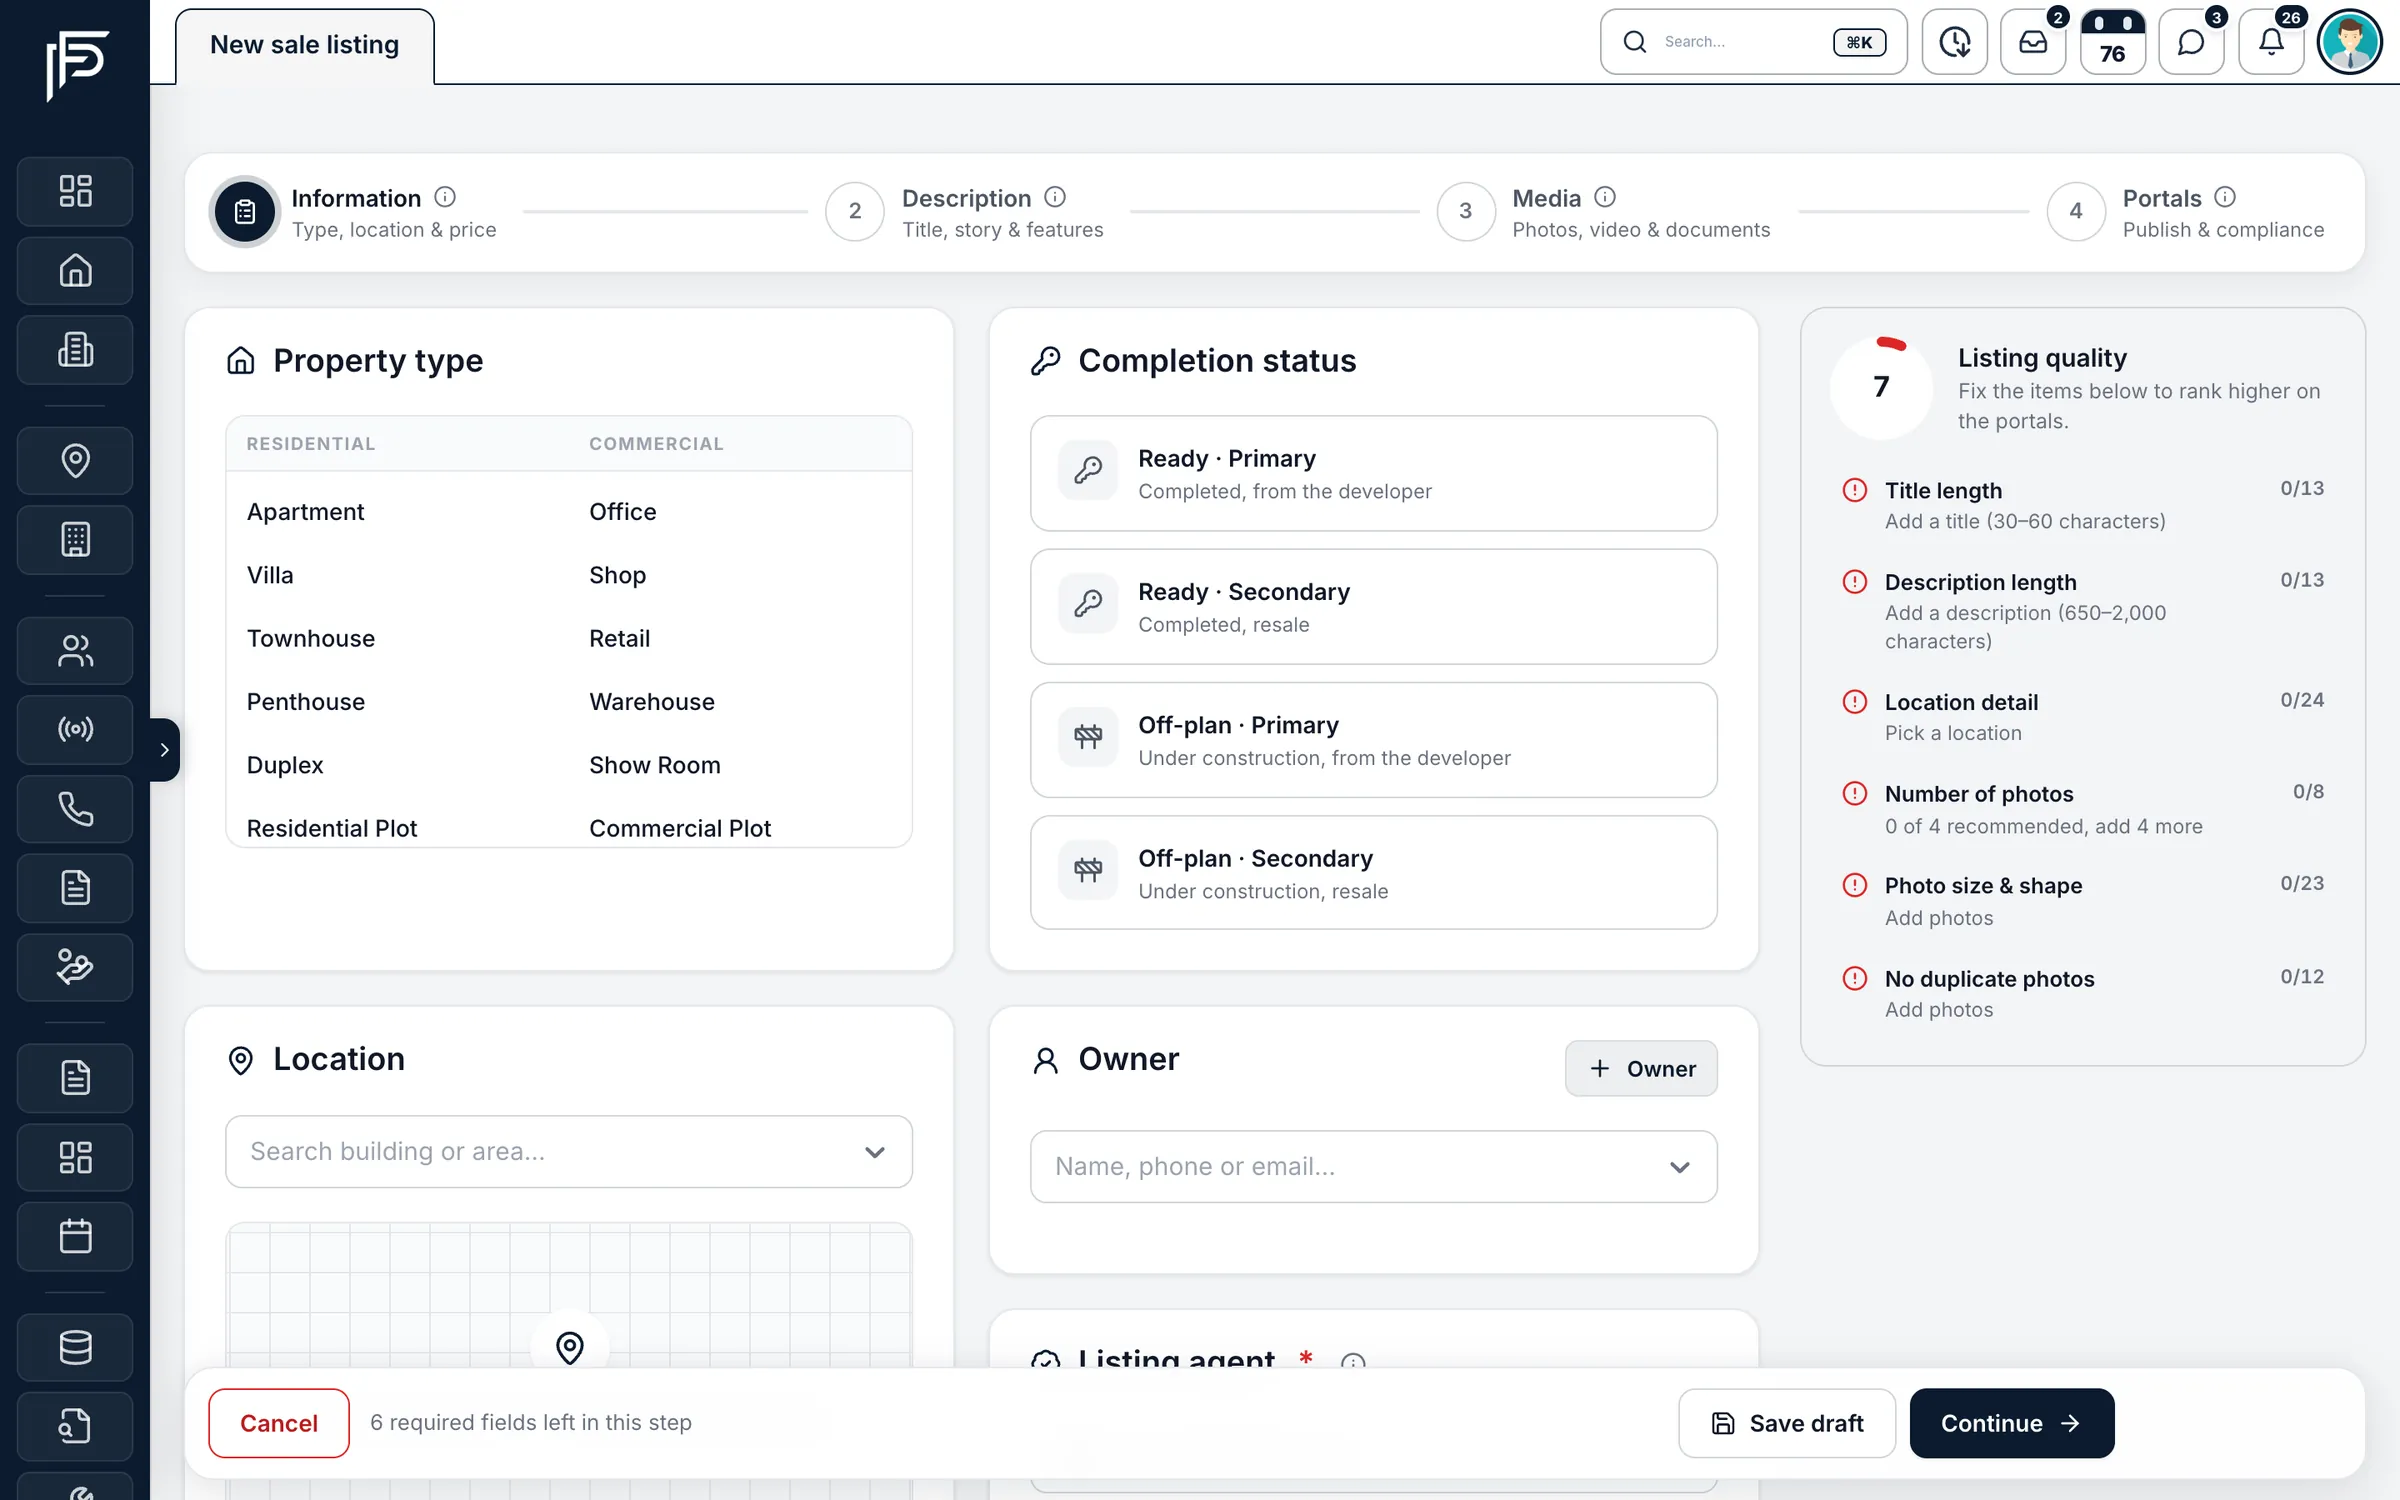
Propfusion CRM: Four-step new sale listing form with property type, completion status, location, owner and a listing quality checklist
Step 1, Information: type, completion status, location and owner, with the listing quality score alongside.

Publish a listing and check it is live

Get a listing onto Property Finder, Bayut and Dubizzle, then in front of clients.

  1. 1Make sure the listing is Active. Its quality score shows what is missing, such as photos, a description or the permit.
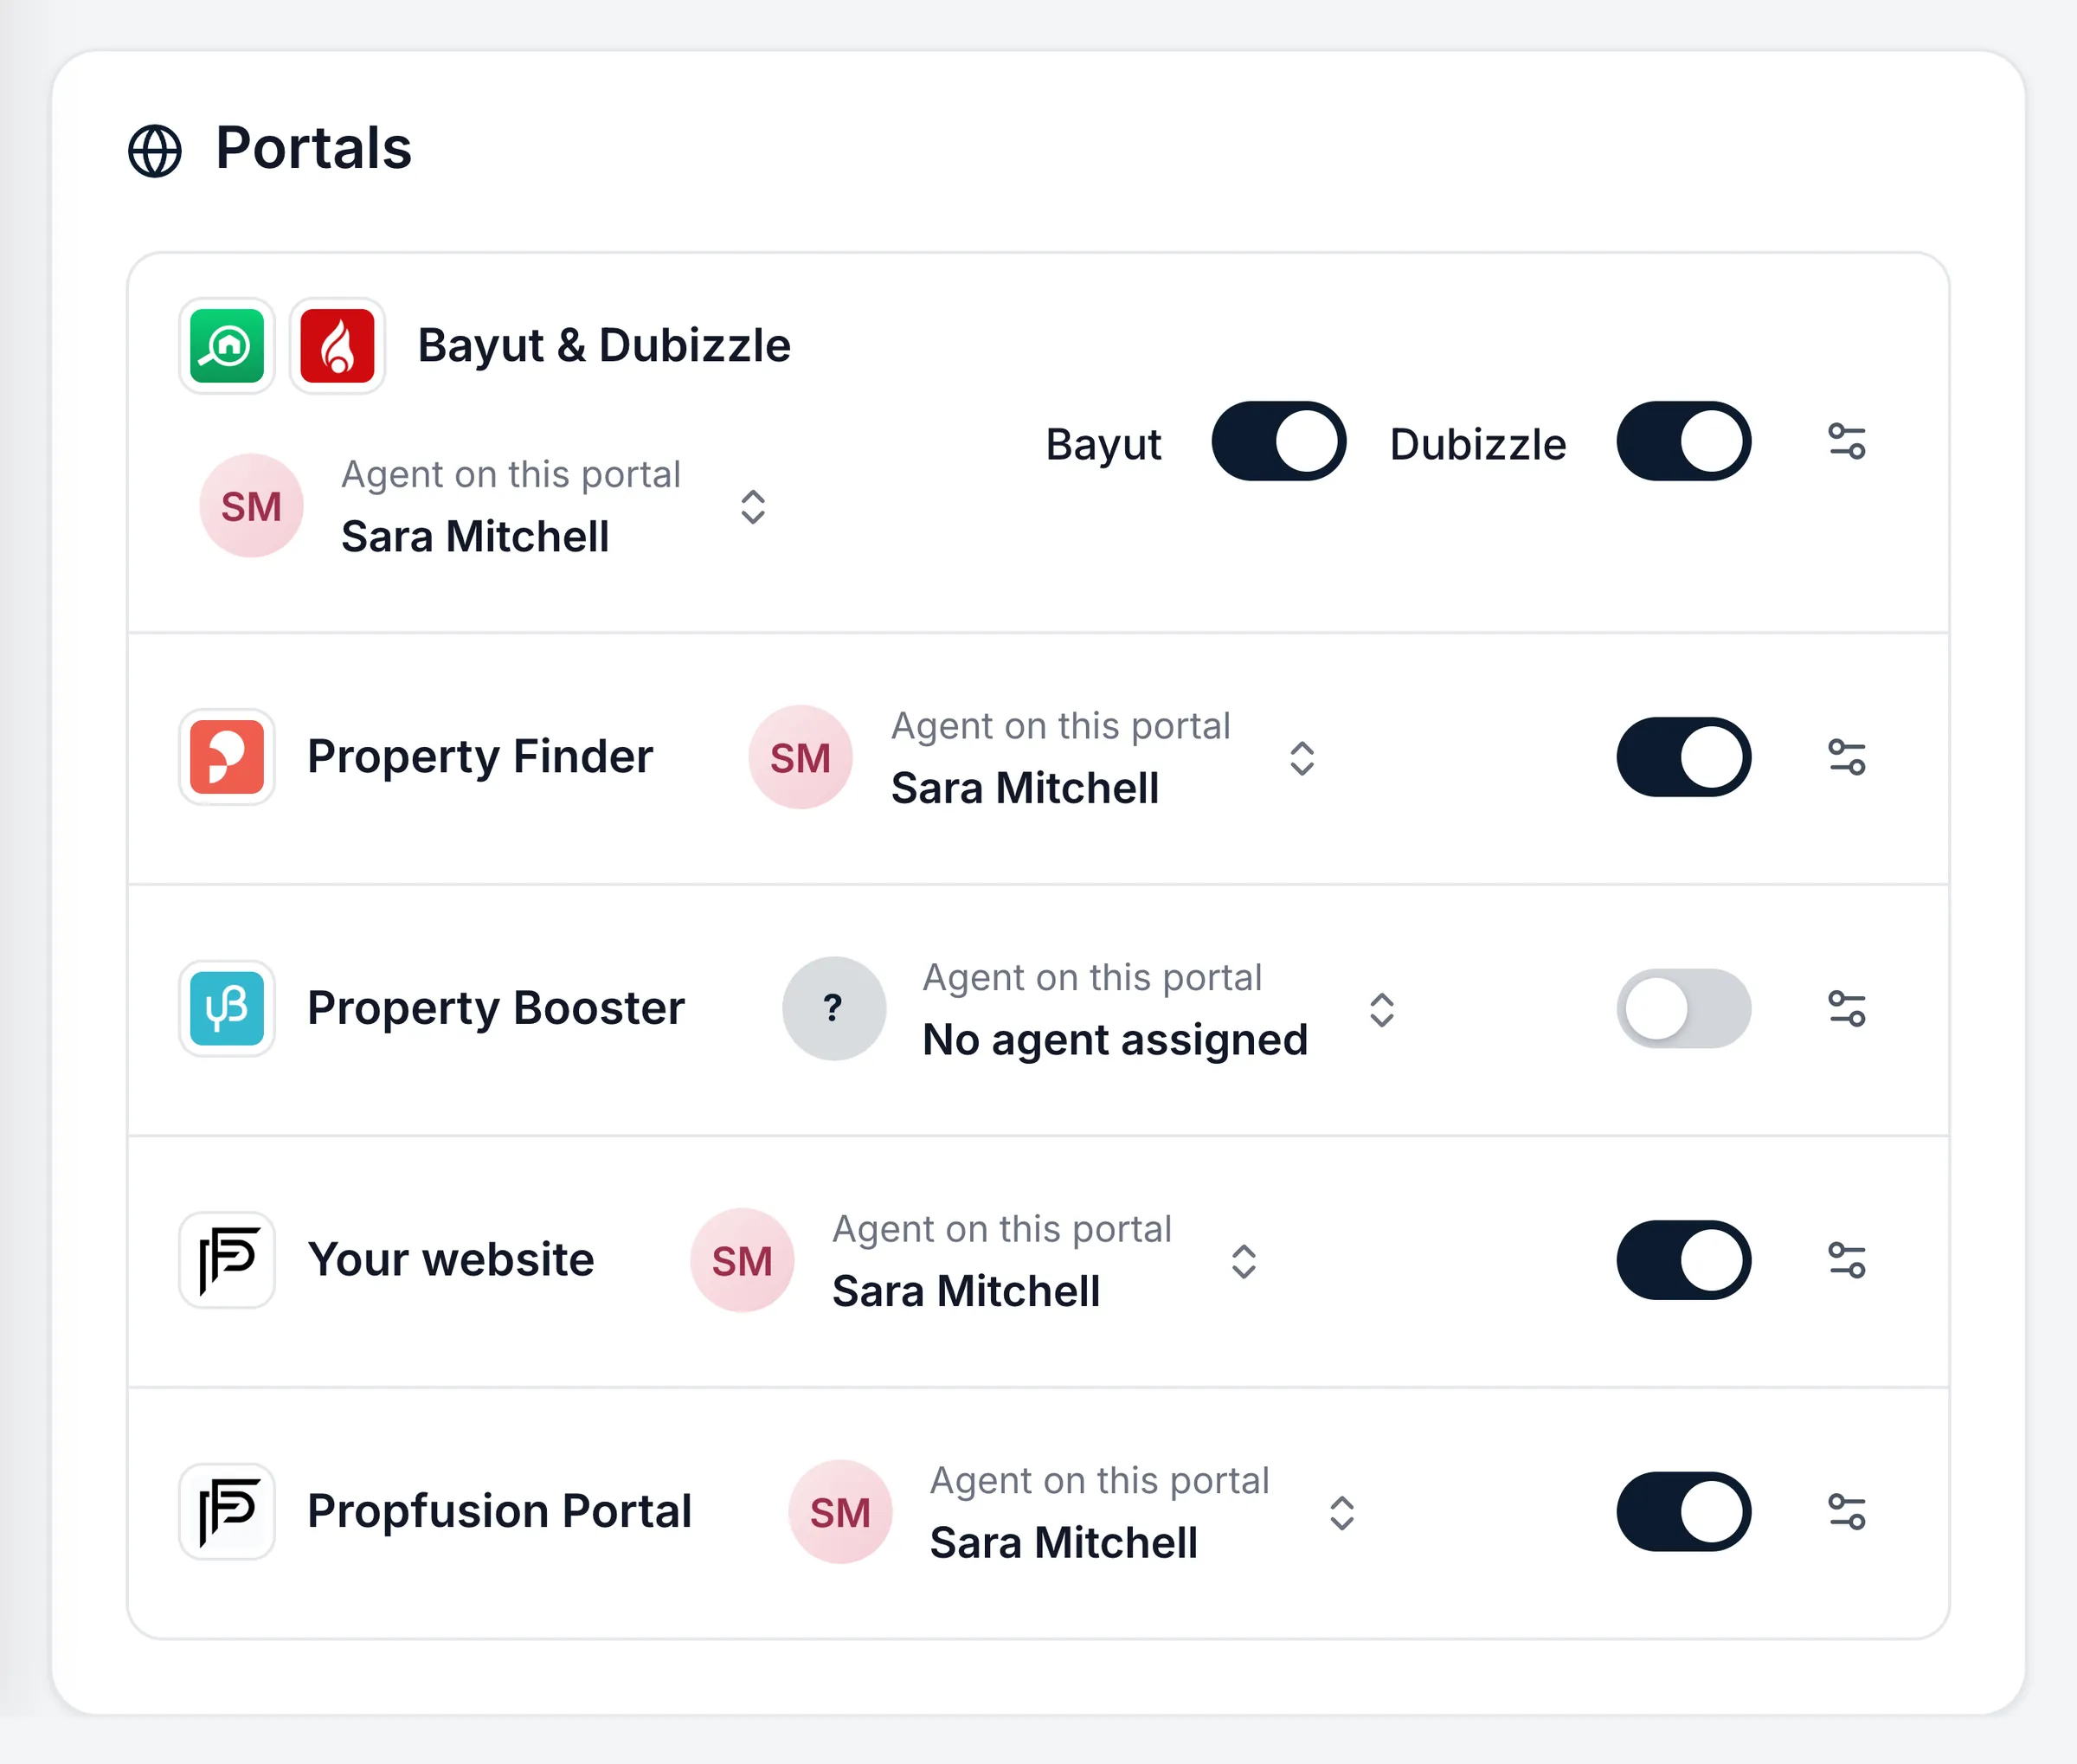
  2. 2Open the listing and use the switches in its Portals card (or the portal icons in the listings table) to publish it or take it down, and pick the agent shown on each portal. If your company needs approval, your manager gets the request.
  3. 3In the listing's menu, Check portal status shows whether it is live right now and what to fix if not.
  4. 4Share a branded PDF brochure or a link on WhatsApp, then add a follow-up on the client's lead.

Tour in the CRM: Publish and share a listing

Propfusion CRM: Listing Portals panel with on/off toggles and an agent per portal for Bayut, Dubizzle, Property Finder and your website
The Portals card on a listing: Bayut, Dubizzle, Property Finder and your website, each with its own switch and the agent shown there.

Work your follow-ups

Your agenda: overdue, today and upcoming reminders.

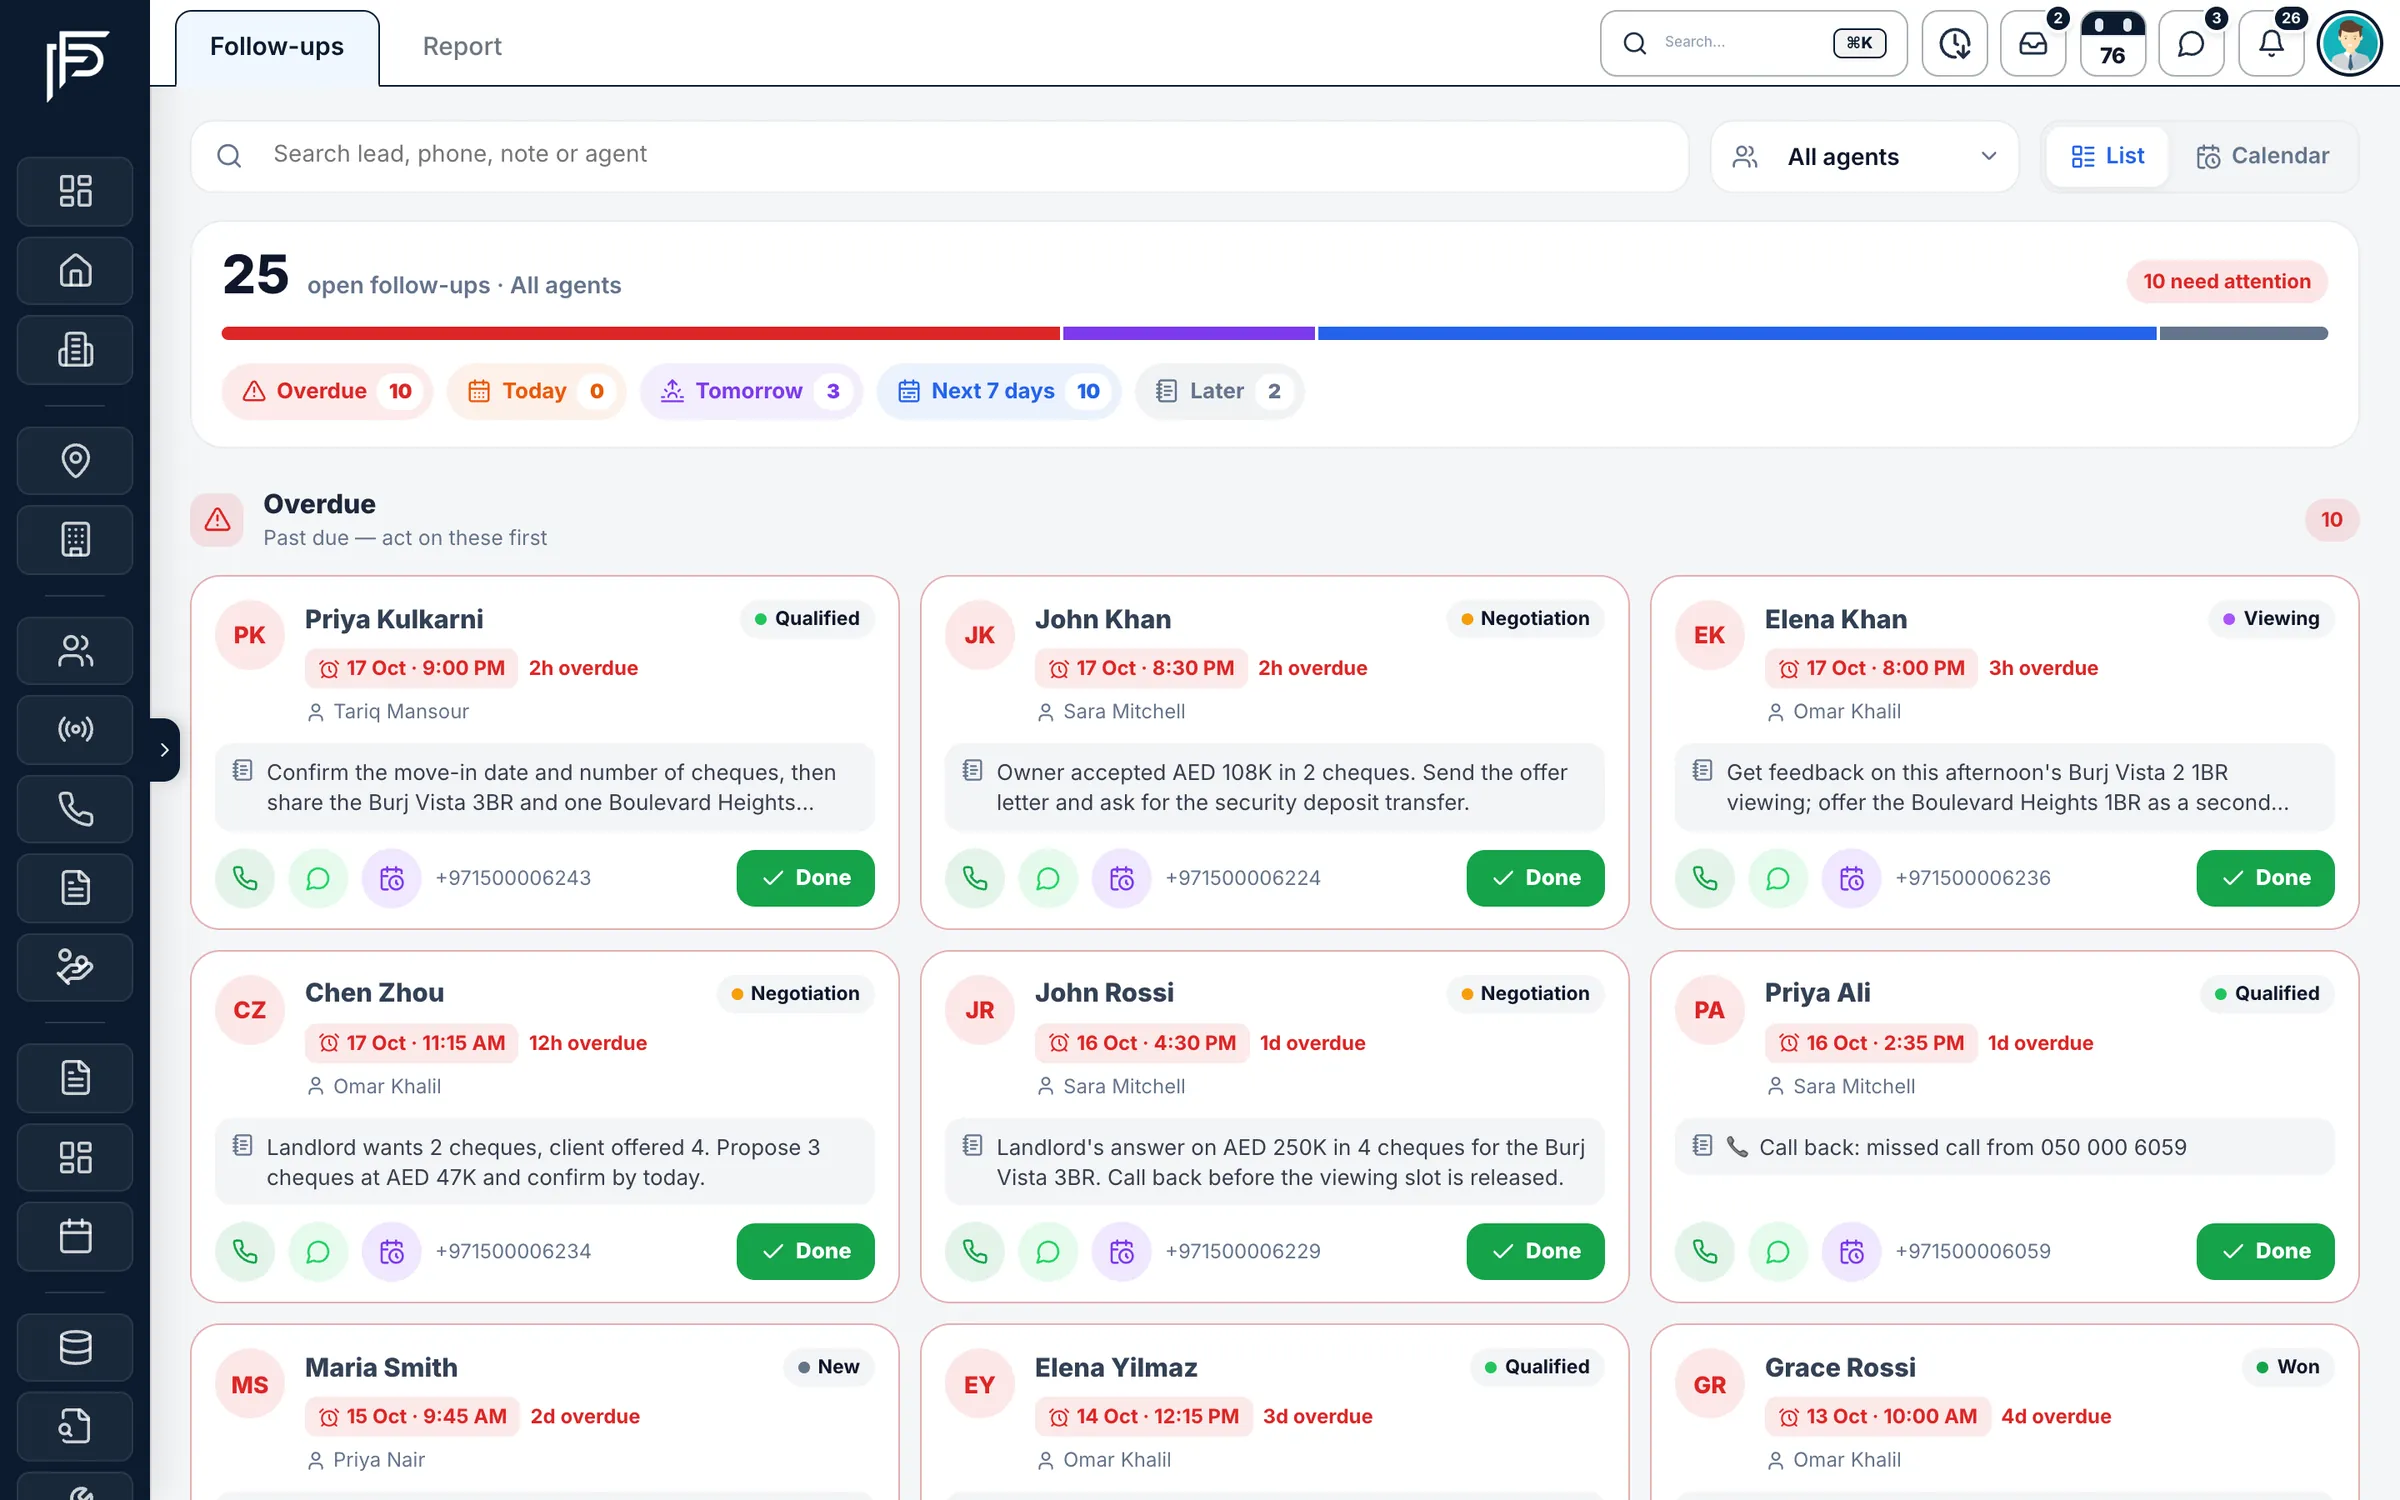
  1. 1Open Follow-ups. Overdue reminders come first, then today, tomorrow and later.
  2. 2Clear the overdue ones first: they count against your agent health.
  3. 3Mark a follow-up done, or snooze it: 1 hour, this evening, tomorrow 10 AM, 3 days, a week or a date you pick.
  4. 4Switch to the calendar to see your week. Managers can pick an agent to see their agenda.

Tour in the CRM: Never miss a follow-up

Propfusion CRM: Follow-ups for all agents with overdue, today, tomorrow and next-7-days counts and overdue cards with notes
Overdue first, then today, tomorrow and the next 7 days, each card with call, WhatsApp, reschedule and Done.

Create a tenancy contract with cheques

Fill in the contract from the listing and let it set up the rental record.

  1. 1In Leasing & Contracts, click New contract and pick the Tenancy Contract template.
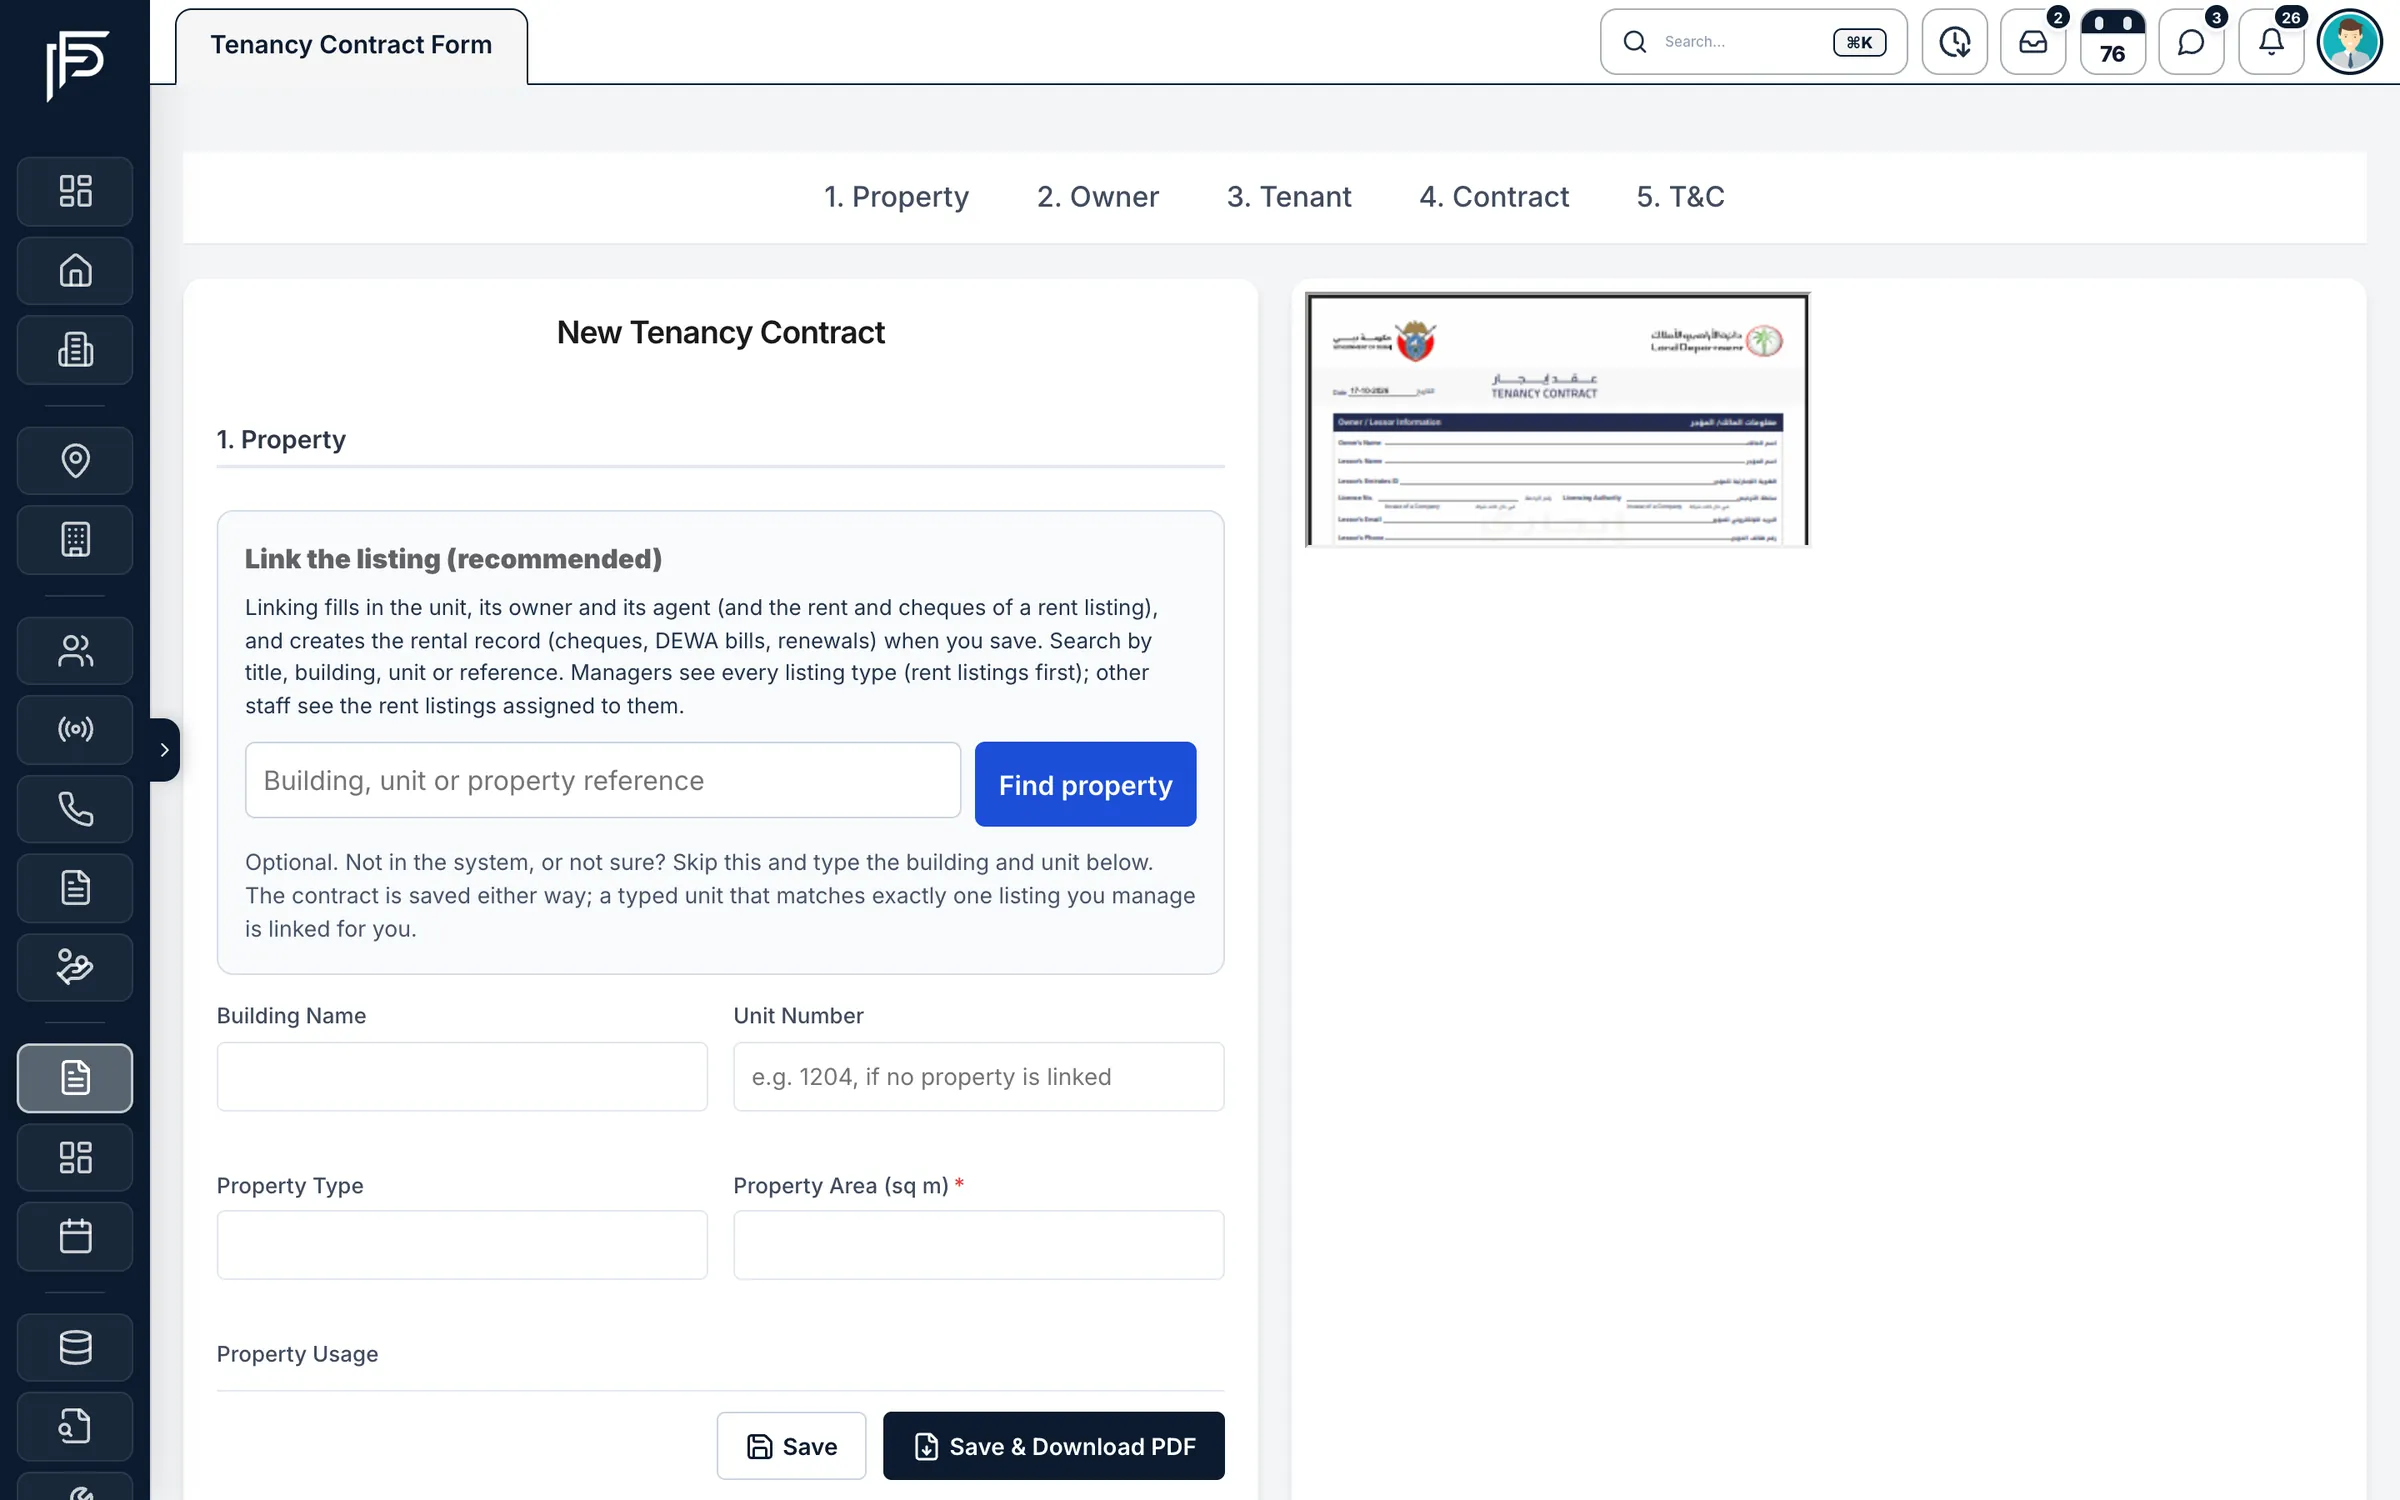
  2. 2Find the property: the unit, owner and agent fill in, and from a rent listing also the rent and number of cheques.
  3. 3Set the number of cheques, the first cheque number, the bank and the name on the cheques. Rent is split evenly across them.
  4. 4Save, or Save & Download PDF to sign. With a linked listing, saving creates the rental agreement with its cheques and renewal reminders.

Tour in the CRM: Tenancy contract with cheques

Propfusion CRM: Five-step tenancy contract form that links a listing to fill in details, with a Dubai tenancy contract preview
Link the listing and the contract fills in the unit, owner, agent, rent and cheques, with the form preview beside it.

Create a lead

Add a walk-in, a call or a referral in under a minute.

  1. 1In Leads, click Add a lead and choose what the client wants: buy, rent or not sure yet.
  2. 2Add the areas or buildings they're interested in. Add more than one if they're flexible.
  3. 3Enter the name and phone (both required), then the email, source, budget, bedrooms and property type.
  4. 4Press Submit. The lead is assigned straight away and the agent gets a notification.
  5. 5Call or WhatsApp the client from the lead (your response time counts from now), then add a follow-up.

Tour in the CRM: Create a lead, step by step

Reset your password

Locked out? You can do this yourself in a minute.

  1. 1On the login page, click Forgot your password?
  2. 2Enter your email address and click Send Reset OTP.
  3. 3Enter the code from the email. If several arrived, use the newest one.
  4. 4Type a new password of at least 8 characters, confirm it, save and log in.

In the User Manual: Troubleshooting, Login & account

More topics

Each of these has a guided tour in the CRM under Tutorials, and a feature page with the real screens. Want a walkthrough with your own data? Visit the Help Center or contact support.

Modules

The main modules, at a glance

What each part of Propfusion does, with a page on each one showing the real screens.

All features

Inside the CRM

The full User Manual, one click away

Signed-in users open the User Manual from the avatar menu: Support, then User Manual. Its 20 sections cover the main modules, with search, bookmarks and a reading time for each.

Reading paths by role

  • New userOverview, Getting Started, Chat & Support, Troubleshooting
  • Sales agentGetting Started, Leads, Targets & Performance, PropFusion AI
  • Property managerLeasing & Cheques, Owners & Tenants, Contracts, Owner Money
  • AdministratorAdmin & Settings, Users & Roles, Integrations, Deals

20 sections

  1. 1Project Overview6 min
  2. 2Getting Started10 min
  3. 3Authentication & Users12 min
  4. 4Lead Management11 min
  5. 5Property Management15 min
  6. 6Calendar & Scheduling8 min
  7. 7Dashboard & Analytics5 min
  8. 8Targets & Performance16 min
  9. 9Owners, Tenants & Contacts11 min
  10. 10Contract Management13 min
  11. 11Leasing, Cheques & Maintenance22 min
  12. 12PropFusion AI & CEO Studio17 min
  13. 13Deals, Invoices & Compliance15 min
  14. 14Owner Money & Finance14 min
  15. 15Reports & Analytics8 min
  16. 16Legal Cases & Company Assets14 min
  17. 17Admin & Settings11 min
  18. 18Integrations10 min
  19. 19Chat, Calls & Support12 min
  20. 20Troubleshooting9 min

Prefer to be shown?

Book a live demo and our team in Dubai will set it up with you, or message us on WhatsApp with any question about the CRM.